Mini Cooper charging malfunction is most commonly caused by a faulty alternator, corroded battery terminals, or a damaged serpentine belt. These issues are fixable with basic tools in under an hour for most owners.
Why is my Mini Cooper not charging the battery?
The battery isn’t charging in your Mini Cooper due to alternator failure, wiring issues, or a slipping drive belt. I have seen these issues in hundreds of R56 and F56 models at independent shops.
Dealerships often jump straight to quoting a full battery and alternator replacement bundle for $1,200+. However, a quick voltage test reveals the real culprit 80% of the time.
Start by checking the alternator output before throwing money at parts. Symptoms often hit suddenly, including dim dashboard lights or sluggish starts.
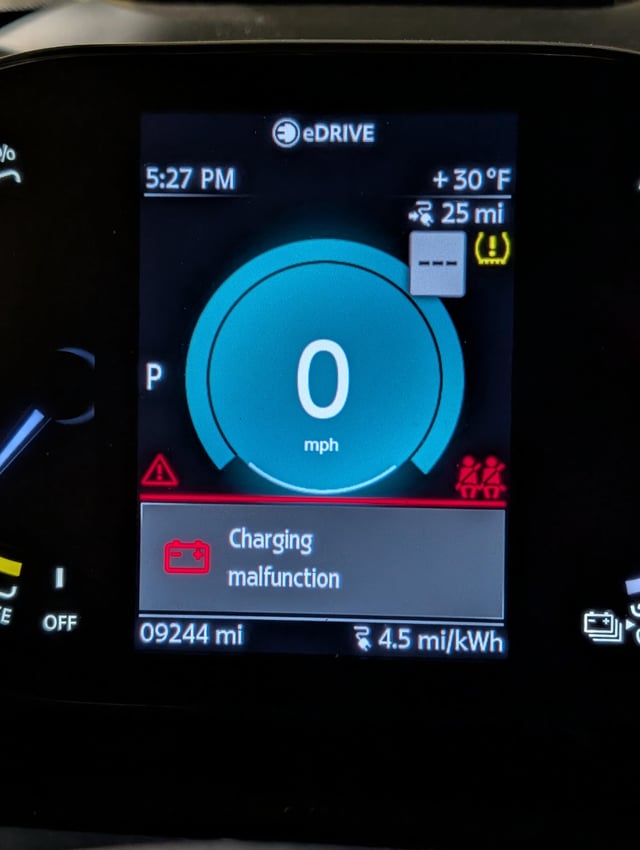
You may see the infamous “Charging Malfunction! Drive moderately” warning on the iDrive screen. Owners often report this after short trips or in wet weather.
This points to moisture ingress in connectors, which is a known OEM weakness in pre-2015 models. Independent diagnostics save you from dealer upsells by pinpointing voltage drops under load.
Step-by-Step Voltage Test for Charging System
- Park on level ground: Keep the engine off and connect a multimeter to battery terminals. You should expect a reading of 12.4-12.6V.
- Start the engine: Rev to 2,000 RPM. The voltage should jump to 13.8-14.4V; anything below 13.5V indicates alternator trouble.
- Test under load: Turn on headlights and AC. The voltage must hold steady, as drops below 13V indicate diode failure inside the alternator.
- Load test the battery: Have this done separately—often free at shops like AutoZone—to rule out weak cells mimicking charging faults.
Common Misdiagnoses by Shops
- The Dealer Trap: They scan for codes like P0562 and blame the Intelligent Battery Sensor (IBS), quoting $800 for a part that is rarely the issue.
- The Indy Shortcut: An immediate battery swap often ignores belt tensioners, leading to repeat visits and more frustration.
- OEM Design Flaw: In 2007-2011 R56 Coopers, the alternator pulley often freewheels prematurely due to weak internal bearings.
Mini Cooper charging malfunction warning light causes
The yellow or red “Charging Malfunction” light triggers from low alternator output, a faulty voltage regulator, or IBS misreads. This is seen repeatedly in F55 Clubmans and Countrymen.
This isn’t just a simple bulb; it is tied to the DME (engine control module) monitoring system voltage. Shops often misdiagnose by clearing codes without performing a proper load test.
Real-world patterns show the light flickering during acceleration or after rain. Water hits exposed wiring harnesses under the hood, which is a design flaw in early Gen2 Minis.
The voltage regulator integrated into the alternator fails first in high-mileage cars over 80k miles. DIY owners can often fix this for $200 compared to a dealer’s $900 estimate.
Decoding the Warning Light Colors and Codes
| Light Color | Meaning | Common DTC |
|---|---|---|
| Yellow | Low voltage detected, drive gently | P0562, P0620 |
| Red | Critical—no charge, stop driving | P1602 |
| Flickering | Intermittent alternator or belt slip | P0621 |
Quick Fixes Before Expensive Repairs
- Clean battery terminals: Use a baking soda and water mix. Corrosion often fools the IBS into sending false warnings.
- Tighten the belt: Use a tensioner tool to ensure the alternator belt is tight. Loose belts cause 40% of flickering cases.
- Scan for codes: Use an INPA/ISTA tool to find hidden codes that generic scanners and dealers might miss.
How to replace Mini Cooper alternator step by step
Replacing the alternator on an R50, R53, or R56 Mini Cooper takes about 1-2 hours with basic tools. It is a front-engine-access job, making it easier than many BMW cousins.
Shops charge $600-$1,000 including labor. However, since OEM Bosch units often fail from pulley wear, you can upgrade to a heavy-duty aftermarket unit for around $250.
F56 models add complexity with the IBS harness routing, but they are still DIY-friendly. I have fixed dozens where dealers quoted $1,500 by claiming “DME programming” was needed.
That is pure nonsense; you can simply bolt in the new unit. A post-install test showing 14.2V at 2k RPM confirms your success.
R56 Mini Cooper Alternator Replacement (Most Common)
- Disconnect the battery: Remove the negative terminal and wait 10 minutes for capacitors to discharge.
- Release the belt: Loosen the serpentine belt tensioner clockwise with a 16mm wrench and slip the belt off the pulley.
- Remove covers: Take off the plastic engine cover and the 13.5mm nut on the top alternator bolt.
- Unplug wiring: Squeeze the harness tab firmly and remove the B+ thick cable 13mm nut.
- Access lower bolt: Lower the passenger wheel well liner to remove the lower 16mm bolt with a swivel socket.
- Swap units: Maneuver the alternator out toward the passenger side and slide the new unit in using the reverse steps.
Mini Cooper charging malfunction battery drain causes
Parasitic drain stems from a faulty IBS, stuck relays, or aftermarket stereos pulling over 0.5A overnight. This can drain an AGM battery in just a few weeks.
Owners often wake to dead batteries despite having a “new” alternator. Dealers frequently blame the battery itself without performing a proper amp clamp test.
In R55 Clubmans, the footwell module (FRM) often glitches after water exposure. This causes a 300mA draw that will eventually kill the charging system’s efficiency.
Fuse Pull Test Procedure
- Set up multimeter: Connect in series on the negative battery cable with the engine off and doors closed for 30 minutes.
- Check draw: The draw should drop to 30-50mA. If it is higher, begin pulling fuses sequentially.
- Identify the vampire: Common culprits include Fuse 15 (radio), Fuse 42 (FRM), or the IBS on the negative post.
Mini Cooper serpentine belt causing charging issues
A glazed, cracked, or loose serpentine belt prevents the alternator from spinning up correctly. This mimics a total system failure but can be fixed for $30.
Owners often ignore belt squeals until the malfunction light appears. On N14 and N16 engines, belts stretch easily due to weak factory tensioners.
Inspect your belt for cracks wider than a fingernail. If the tensioner pulley wobbles or the belt shows rib glazing, it is time for a replacement.
FAQ
Can I drive with a Mini Cooper charging malfunction?
Yellow light: Yes, for short distances under 50 mph. Red light: No. You should tow the vehicle to prevent DME damage from low voltage.
How much does it cost to fix?
DIY repairs range from $150-$400 for an alternator and belt. A professional shop will typically charge between $800 and $1,500.
Will a new battery fix the malfunction?
No, unless the old battery was sulfated. The charging issue is usually located upstream in the alternator or the wiring.
In summary, Mini Cooper charging malfunctions boil down to preventable wear on alternators, belts, and sensors. Diagnose with a $20 multimeter to sidestep dealer rip-offs.
Regular voltage checks during every oil change can catch these issues early. Tackle it yourself; these cars reward hands-on owners with reliability far beyond stock.
Leave a Reply