To turn off your check engine light permanently, you must diagnose and resolve the specific OBD-II diagnostic trouble code (DTC) causing the fault, or use an ECU tuning tool to programmatically disable specific emission codes (such as rear O2 sensor codes after a catalytic converter delete). Temporary methods like disconnecting the battery or clearing codes with an OBD-II scanner will only turn the light off until the engine control unit (ECU) completes its drive cycle and detects the unresolved fault again.
For decades, dealerships and independent shops have treated the check engine light (also known as the Malfunction Indicator Lamp, or MIL) as a blank check. They charge diagnostic fees ranging from $100 to $200 just to plug in a scanner, often followed by overquoted repair estimates for simple components.
Understanding how your vehicle’s ECU monitors emissions and engine performance allows you to take control. Whether you want to perform a legitimate DIY repair, install a bypass kit for a known OEM design flaw, or use tuning software to disable a code permanently, this guide covers the exact real-world methods used by professional diagnostic technicians.
Can you permanently disable a check engine light without fixing the problem?
No, you cannot permanently disable a check engine light without either repairing the underlying fault, flashing the Engine Control Unit (ECU) to ignore specific diagnostic trouble codes (DTCs), or physically removing the LED bulb from the instrument cluster (which is highly illegal and will cause your vehicle to fail state emissions inspections).
Many vehicle owners mistakenly believe that clearing the codes with a cheap OBD-II scan tool or disconnecting the battery is a permanent solution. However, the ECU constantly monitors your vehicle’s sensors through “readiness monitors” during everyday driving. Once the specific driving conditions are met—known as a drive cycle—the ECU retests the system, detects the unresolved fault, and immediately illuminates the light again.
The Myth of the Battery Disconnect Trick
Disconnecting the negative battery terminal for 15 minutes discharges the capacitors in the ECU, clearing its temporary Keep Alive Memory (KAM). While this turns off the check engine light temporarily, it also erases your radio presets, clock, and seat positions. More importantly, it resets all OBD-II readiness monitors to “Not Ready,” which will cause an immediate automatic fail at any emissions testing station.
ECU Tuning and DTC Deletes
In the automotive enthusiast and tuning world, the only digital way to permanently disable a check engine light without fixing the physical system is through ECU reprogramming. Using software like HP Tuners, Cobb Accessport, or custom flash tunes, a calibrator can change the ECU’s internal logic. They set specific trouble codes (such as P0420 for low catalytic converter efficiency) to “No Error Reported,” preventing the check engine light from ever illuminating for that specific fault code.
How to turn off check engine light permanently by fixing the root causes
The only legitimate and legal way to turn off a check engine light permanently is to retrieve the diagnostic trouble codes (DTCs) using an OBD-II scanner, replace the failing component (such as a loose gas cap, oxygen sensor, or mass airflow sensor), and clear the codes to allow the ECU to verify the repair.
Most check engine lights are triggered by minor, easily replaceable sensors that control fuel trim or emissions. Dealerships frequently upsell these simple fixes into multi-thousand-dollar repair bills. By targeting the five most common culprits, you can permanently resolve the light yourself for a fraction of the cost.
1. Replacing a Faulty Gas Cap (P0440, P0442, P0455, P0456)
The Evaporative Emissions (EVAP) system prevents fuel vapors from escaping into the atmosphere by pressurizing the fuel tank. If the rubber seal on your gas cap dries out, cracks, or fails to click shut, the ECU detects a vacuum leak and triggers an EVAP code. Instead of paying a shop $150 to perform a smoke test, inspect the rubber O-ring on your gas cap for dry rot.
If it is damaged, buy an OEM replacement cap, install it, and drive the car for a few days. The light will turn off on its own once the EVAP monitor runs.
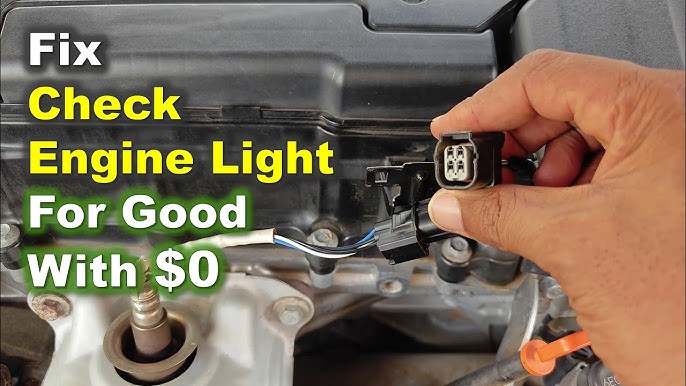
2. Swap Out Failing Oxygen (O2) Sensors (P0130 to P0167)
Modern vehicles use upstream O2 sensors to measure the air-fuel ratio leaving the engine, and downstream O2 sensors to monitor catalytic converter health. These sensors live in the harsh, high-heat environment of the exhaust pipe and typically fail after 100,000 miles. Replacing an O2 sensor is a straightforward DIY job requiring a specialized 22mm O2 sensor socket, some penetrating fluid like PB Blaster, and a replacement OEM sensor (stick to Bosch, Denso, or NTK to avoid compatibility issues).
3. Cleaning or Replacing the Mass Airflow (MAF) Sensor (P0101)
The MAF sensor measures the volume of air entering the engine so the ECU can inject the correct amount of fuel. Over time, oil from aftermarket air filters (like K&N) or airborne dust can coat the sensor’s delicate hot wire, causing false readings. Before buying an expensive new sensor, remove the MAF sensor from the intake duct and spray it thoroughly with specialized CRC Mass Airflow Sensor Cleaner.
Do not use brake cleaner or touch the wire directly, as this will destroy the sensor. Reinstall it after it dries completely.
4. Replacing Spark Plugs and Ignition Coils (P0300 to P0308)
A misfiring cylinder dumps unburnt fuel into the exhaust, which will quickly ruin your catalytic converter and flash the check engine light. If you have a specific misfire code (e.g., P0303 for cylinder 3), swap the ignition coil from cylinder 3 to cylinder 4.
If the code changes to P0304, you have a dead ignition coil that needs replacement. If the misfire stays on cylinder 3, replace the spark plug and check for fuel injector or compression issues.
5. Resolving Catalytic Converter Inefficiency (P0420 / P0430)
Shops love quoting $1,500 to $3,000 to replace catalytic converters when a P0420 code pops up. Before replacing the converter, check for exhaust leaks upstream of the rear O2 sensor, as fresh air leaking into the pipe will trick the sensor into reading a false lean condition. If the converter is truly worn out and you live in a state without strict visual inspections, some DIYers install a spark plug non-fouler (O2 spacer) on the downstream sensor to pull it out of the direct exhaust stream, though this is technically for off-road use only.
How to clear the check engine light manually (Step-by-Step)
To manually clear a check engine light, connect an OBD-II scanner to your vehicle’s diagnostic port under the dashboard, turn the ignition key to the “On” position without starting the engine, select the “Erase Codes” option on the scanner menu, and then drive the vehicle to complete a full drive cycle.
If you have completed a repair and want to turn the light off immediately rather than waiting for the ECU to auto-clear it, you have three primary methods. Choose the method that best matches the tools you have on hand.
Method 1: Using an OBD-II Scan Tool (The Correct Way)
This is the safest and most reliable method because it preserves your ECU’s learned adaptives (like transmission shift points and fuel trims) while only clearing the fault codes.
- Locate the OBD-II port (usually under the driver’s side dashboard near the steering column).
- Plug the scan tool connector firmly into the port.
- Turn the vehicle’s ignition to the “ON” or “RUN” position (do not start the engine).
- Wait for the scanner to boot up and select “Read Codes” to document the existing faults.
- Navigate to the “Clear Codes” or “Erase” menu and press enter.
- Turn the key off, unplug the scanner, and start the engine to verify the light is gone.
Method 2: The Battery Disconnect / Hard Reset (The Temporary Way)
Use this method only if you do not have access to an OBD-II scanner and need to clear the RAM of an older vehicle (pre-2010).
- Turn off the ignition and remove the key from the vehicle.
- Use a wrench to loosen the nut on the negative (-) battery terminal clamp and slide it off the post.
- Secure the cable away from the battery so it cannot make contact.
- Press and hold the horn button or turn on the headlights for 30 seconds to drain any residual voltage stored in the ECU capacitors.
- Wait 15 minutes, then reconnect the negative terminal clamp and tighten it securely.
- Start the car; the light should be off, but remember that your drive cycle monitors have been completely reset to zero.
Method 3: The Ignition Cycle Method (Self-Clearing)
If you have successfully fixed the mechanical problem, the ECU is designed to turn the light off on its own without any tools once it verifies the repair.
- Start the vehicle from a cold start (engine temperature below 122 degrees Fahrenheit) and let it warm up to operating temperature.
- Drive the vehicle at a steady highway speed (between 55 and 60 mph) for approximately 15 minutes.
- Bring the vehicle home, park it, and let the engine cool down completely.
- Repeat this process for 3 to 5 consecutive trips; if the ECU detects no faults during these cycles, it will automatically extinguish the check engine light.
| Diagnostic Code (DTC) | Common Root Cause | Typical Dealership Cost | DIY Permanent Fix Cost |
|---|---|---|---|
| P0440 / P0455 | Leaking or Loose Gas Cap | $150 – $250 | $15 (New OEM Cap) |
| P0130 – P0167 | Failed Oxygen (O2) Sensor | $350 – $600 | $40 – $90 (DIY swap) |
| P0101 | Dirty Mass Airflow (MAF) Sensor | $200 – $400 | $8 (MAF cleaner spray) |
| P0300 – P0308 | Worn Spark Plugs / Bad Coil | $400 – $800 | $50 – $120 (Parts only) |
| P0420 / P0430 | Catalytic Converter Inefficiency | $1,200 – $3,000 | $15 (O2 spacer / cleaning) |
Model-specific check engine light workarounds and common failures
Different automotive brands have distinct engineering weaknesses that trigger the check engine light; for example, GM trucks frequently suffer from corroded knock sensors, Fords experience stuck EVAP purge valves, and Toyotas often trigger lights due to sensitive secondary air injection pumps.
Instead of chasing generic diagnostics, targeting the specific engineering quirks of your vehicle make can save you hours of frustration. Below are the most common real-world failure patterns for major manufacturers and how to bypass or fix them permanently.
General Motors (Chevy/GMC) Knock Sensor Failures (P0327 / P0332)
On older Gen III LS V8 engines (5.3L, 6.0L, etc. from 1999-2006), the knock sensors are located in the valley pan under the intake manifold. Water easily bypasses the rubber seals, pooling in the sensor wells and corroding them.
The permanent fix is to replace both sensors and the wiring harness. When you install the new rubber boots, build a dam of high-temp RTV silicone around the top of the boots (leaving a small gap at the rear for drainage) to prevent future water intrusion.
Ford EcoBoost EVAP Purge Valves (P1450)
Ford vehicles, particularly those with EcoBoost engines (Focus, Fusion, F-150), are notorious for failing EVAP purge valves. When the valve sticks open, it draws raw fuel vapor into the engine directly from the tank, causing hard starting after refueling and triggering a P1450 code. Dealerships will often charge to replace the entire charcoal canister assembly.
The permanent DIY fix is to buy the purge valve assembly (usually located right on top of the engine bay), swap it out in 10 minutes with simple hand tools, and clear the codes.
Toyota Secondary Air Injection Pumps (P0418 / P2440)
Toyota Tundras, Sequoias, and Tacomas with the 4.6L or 5.7L V8 frequently suffer from moisture entering the secondary air injection pumps, causing the valves to rust stuck. This triggers a limp-home mode that limits your vehicle to 30 mph, and the dealer repair estimate is typically over $2,000 to replace the entire system under the intake manifold.
The permanent, enthusiast-approved workaround is to install an aftermarket electronic bypass kit (such as the Hewitt Tech kit). This plug-and-play kit tricks the ECU into thinking the system is functioning perfectly, permanently turning off the light and keeping the truck out of limp mode.
Subaru Gas Cap and P0420 Sensitivity
Subarus are incredibly sensitive to exhaust leaks and minor catalytic converter degradation. When a Subaru triggers a check engine light, it also flashes the Cruise Control light and disables the vehicle’s traction control system as a safety measure. If you get a P0420 code on an older Outback or Forester, check the exhaust flange gaskets right before and after the catalytic converter.
Replacing these cheap $10 crushed-metal gaskets often seals the system and permanently clears the code, saving you from buying an unnecessary catalytic converter.
Frequently Asked Questions
Why does my check engine light turn off and on by itself?
A fluctuating check engine light indicates an intermittent fault. This occurs when a sensor reading briefly crosses the threshold into a failing state (such as a misfire occurring only under heavy acceleration or an EVAP leak that only registers when the fuel tank is between 1/4 and 3/4 full) and then returns to normal operating parameters.
Will a check engine light clear itself after I fix the problem?
Yes, most modern vehicles will automatically turn off the check engine light once the self-diagnostic monitors run and pass multiple times without detecting the fault. This typically takes between 3 to 5 consecutive driving cycles under varying speeds and temperatures.
Can I pass an emissions inspection if I just cleared the check engine light?
No, you cannot pass an inspection immediately after clearing the codes. Clearing the codes resets all of your vehicle’s OBD-II readiness monitors to “Not Ready,” which will trigger an automatic failure at the testing station until you complete a full drive cycle and the monitors reset to “Ready.”
What happens if I ignore a flashing check engine light?
A flashing check engine light indicates a severe engine misfire that is actively dumping raw, unburnt fuel into your exhaust system. Ignoring a flashing light will rapidly overheat and destroy your catalytic converter, turning a simple spark plug or coil replacement into a multi-thousand-dollar repair.
Does disconnecting the battery damage my car’s computer?
No, disconnecting the battery will not damage your vehicle’s computer. However, it will erase the volatile RAM, which includes learned fuel-trim values and transmission shift adaptives, meaning your car may idle roughly or shift slightly differently for the first 50 miles while the computer relearns these parameters.
Conclusion
Attempting to permanently turn off a check engine light by cutting wires, pulling bulbs, or repeatedly clearing codes without making repairs is a losing battle. Modern automotive ECUs are highly sophisticated networks that require specific inputs to maintain a clean bill of health. By investing in a basic OBD-II scanner, diagnosing the specific trouble codes, and targeting common failure points like oxygen sensors, gas caps, and EVAP valves, you can permanently resolve the light yourself, bypass expensive dealership diagnostic fees, and keep your vehicle running reliably for years to come.
Leave a Reply