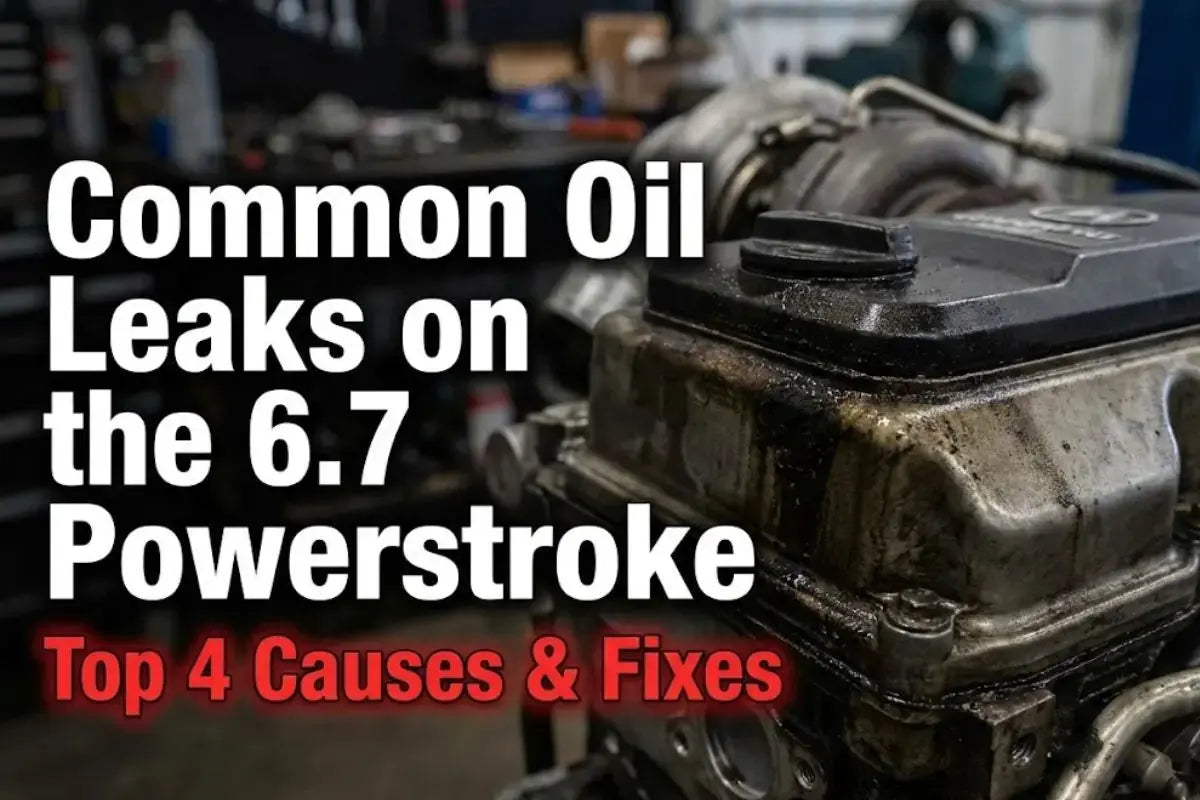
The most common oil leaks on a 6.7L Powerstroke diesel engine occur at the upper oil pan gasket (silicone sealant failure), the vacuum pump gasket on the front passenger side of the engine block, the turbocharger oil feed/return lines, and the lower oil pan. Repairing these leaks ranges from a simple $20 DIY vacuum pump seal replacement to a highly labor-intensive $2,000+ upper oil pan reseal that requires dropping the transmission or front axle assembly.
The 6.7L Powerstroke, introduced by Ford in 2011, is a highly capable and durable engine. However, its complex split-block structural design and intense operating temperatures make it highly susceptible to oil leaks over time. Understanding where these leaks originate and how to properly diagnose them can save you thousands of dollars in unnecessary dealership repairs.
Many independent shops and dealerships struggle to accurately diagnose these leaks due to the compact nature of the engine bay. Oil from a minor leak at the top or front of the engine frequently flows downward and backward, coating the bottom of the engine and mimicking a catastrophic rear main seal or upper oil pan failure. This guide breaks down every common leak point, how to accurately diagnose them, and step-by-step solutions to fix them permanently.
Where are the most common oil leaks on a 6.7 Powerstroke?
The most common oil leak locations on a 6.7 Powerstroke are the aluminum upper oil pan bedplate interface, the front-mounted vacuum pump gasket, the lower oil pan (especially on early plastic pan models), and the turbocharger oil feed and drain lines situated in the engine valley.
To understand why these leaks occur, you must first understand the unique design of the 6.7 Powerstroke crankcase. Unlike older engines with a simple engine block and a single oil pan, the 6.7L uses a two-piece crankcase system. It consists of a cast-iron engine block, an aluminum upper oil pan (often referred to as the bedplate or upper pan), and a lower oil pan bolted directly to the bottom of the upper pan.
This design creates multiple sealing surfaces that are subjected to different thermal expansion rates. Because the engine block is cast iron and the upper oil pan is aluminum, they expand and contract at different rates as the engine heats up and cools down. This constant movement puts immense shear stress on the RTV silicone sealant used at the factory, eventually causing it to crack, degrade, and leak.
Additionally, the high-pressure environment of a turbocharged diesel engine means that any restriction in the crankcase ventilation system will immediately find the weakest seal to escape. The seals most vulnerable to this pressure are the upper oil pan RTV bead and the molded rubber gasket behind the engine’s vacuum pump.
How to diagnose a 6.7 Powerstroke upper oil pan leak vs. vacuum pump leak
To accurately diagnose whether your leak is coming from the expensive upper oil pan or the inexpensive vacuum pump, thoroughly spray the front and sides of the engine with brake cleaner, add UV leak detection dye to the engine oil, and use a blacklight to trace the fluid path starting from the front passenger side of the block.
One of the most common and expensive misdiagnoses on the 6.7 Powerstroke is mistaking a vacuum pump gasket leak for an upper oil pan or rear main seal leak. The vacuum pump is mounted on the front passenger side of the engine block, directly behind the cooling fan and serpentine belt. When this molded rubber seal fails, oil drips directly onto the front cover and the upper oil pan rail.
As you drive, the air velocity from the cooling fan and road wind pushes this escaping oil along the side rail of the upper oil pan all the way to the back of the engine. By the time the oil drips onto your driveway, it is collecting on the bottom of the transmission bellhousing. This creates the optical illusion of a rear main seal or upper oil pan failure, leading many shops to quote a $2,500 repair when a $20 gasket would solve the problem.
To perform a foolproof diagnosis, follow these steps:
- Degrease the entire engine: Use a high-quality engine degreaser or several cans of brake cleaner to remove all traces of oil from the front cover, oil pan rails, and bellhousing.
- Add UV dye: Pour a bottle of engine-safe UV leak detection dye directly into the oil fill tube.
- Run the engine: Drive the truck for 15 to 30 minutes to allow the dye to circulate and begin seeping through the active leak point.
- Inspect with a blacklight: Park the truck in a dark garage and use a UV blacklight to trace the glowing dye. Start at the vacuum pump on the front passenger side; if you see glowing dye trailing down from the pump along the pan rail, the vacuum pump gasket is your culprit. If the front of the engine is completely dry but dye is weeping directly from the seam between the cast iron block and the aluminum upper pan, the upper oil pan RTV has failed.
Step-by-step guide to fixing the most common 6.7 Powerstroke oil leaks
Fixing 6.7 Powerstroke oil leaks requires a systematic approach, starting with low-effort, high-probability fixes like the vacuum pump gasket and CCV filter replacement before attempting highly complex procedures like the upper oil pan reseal.
1. Vacuum Pump Gasket Replacement (DIY-Friendly)
This is a highly common leak point that can be easily repaired in your driveway with basic hand tools. The vacuum pump is located on the front passenger side of the engine block.
- •Disconnect the negative battery terminals for safety.
- •Remove the serpentine belt using a 1/2-inch drive breaker bar on the belt tensioner.
- •Unbolt the cooling fan shroud or reposition it to gain clear access to the front of the engine.
- •Locate the vacuum pump and remove the four mounting bolts holding it to the front cover.
- •Carefully pull the pump forward, taking care not to damage the internal drive gear.
- •Remove the old molded rubber gasket from the groove in the pump housing.
- •Clean the mating surfaces on both the pump and the engine block thoroughly using brake cleaner and a plastic scraper.
- •Install the new OEM Ford gasket (Part # BC3Z-2A572-A) into the pump groove, ensuring it sits completely flat.
- •Reinstall the pump, torque the mounting bolts in a crisscross pattern to 89 in-lbs (10 Nm), reinstall the belt, and verify the leak is resolved.
2. Crankcase Ventilation (CCV) Filter Replacement
A clogged CCV filter restricts the engine’s ability to vent crankcase pressure. This pressure builds up inside the engine block and forces oil past otherwise healthy gaskets, making CCV maintenance your first line of defense against oil leaks.
- •Locate the large plastic CCV box on top of the driver-side valve cover.
- •Remove the mounting screws securing the CCV lid (on serviceable models, typically 2011-2016).
- •Pull out the old, oil-saturated filter element.
- •Clean any standing oil or sludge out of the inside of the housing using a lint-free shop towel.
- •Insert the new OEM replacement filter element and ensure the sealing O-ring is seated correctly.
- •Reinstall the cover and torque the screws to 89 in-lbs (10 Nm). Note: On 2017+ models with sealed CCV boxes, the entire assembly must be replaced as a single unit if it becomes clogged.
3. Lower Oil Pan Replacement or Reseal
Depending on the model year, your truck may have a plastic or stamped steel lower oil pan. Plastic pans are notorious for warping and leaking, and should always be upgraded to a steel pan when serviced.
- •Drain the engine oil completely by removing the drain plug.
- •Remove the bolts securing the lower oil pan to the aluminum upper oil pan.
- •Carefully pry the lower pan off. If you have a plastic pan, discard it along with its molded gasket.
- •If reusing a steel pan, scrape away all old RTV sealant using a plastic scraper to avoid gouging the aluminum mating surface of the upper pan.
- •Clean both mating surfaces with brake cleaner until they are completely free of oil residue.
- •Apply a continuous 1/8-inch bead of Motorcraft TA-31 RTV silicone sealant to the oil pan flange, circling the bolt holes.
- •Press the pan straight up onto the upper oil pan within 10 minutes of applying the sealant.
- •Install the bolts hand-tight, then torque them in a star pattern to 89 in-lbs (10 Nm) for plastic pans, or 15 ft-lbs (20 Nm) for steel pans. Allow the sealant to cure for at least 12 hours before refilling with oil.
4. Upper Oil Pan Reseal (Advanced Repair)
This is an extremely labor-intensive repair. Because the upper oil pan acts as a structural member of the crankcase, it cannot be easily removed without significant disassembly of the vehicle’s drivetrain.
Professional Tip: To remove the upper oil pan on a 4WD truck, you must either completely remove the front differential and steering linkage, or pull the transmission and slide the oil pan backward. Attempting to shortcut this process by prying the pan down without proper clearance will result in a damaged oil pickup tube and engine failure.
- •Drain the oil and remove the lower oil pan as described in the previous section.
- •Unbolt and remove the oil pickup tube from the bottom of the upper pan assembly.
- •Support the transmission and remove the transmission bellhousing bolts that secure it to the upper oil pan.
- •On 4WD models, drop the front axle housing to create clearance, or alternatively, use an engine hoist to lift the engine off its mounts.
- •Remove the perimeter bolts holding the upper oil pan to the engine block.
- •Carefully break the RTV seal using a specialized oil pan separator tool. Do not hammer screwdrivers into the mating flange, as this will gouge the aluminum pan and cause permanent leaks.
- •Clean the block and pan flanges to bare metal. Any trace of old silicone or oil film will cause the new seal to fail.
- •Apply a precise bead of Motorcraft TA-31 RTV to the pan, reassemble the components, and torque all fasteners to OEM specifications. Let cure for a full 24 hours.
5. Turbocharger Oil Feed & Return Line O-Rings
The turbocharger sits in the valley of the engine, and its oil lines are exposed to extreme exhaust heat, which causes the rubber O-rings to harden and crack over time.
- •Remove the upper intake manifold and air ducting to access the turbocharger valley.
- •Locate the metal oil feed line on top of the turbo and the drain line underneath it.
- •Unbolt the lines and pull them free from the turbo housing and engine block.
- •Replace the hardened O-rings with high-temperature Viton replacements.
- •Clean the mounting ports thoroughly to ensure no debris enters the turbo oiling system.
- •Reinstall the lines, torque the mounting brackets to spec, and verify there are no leaks upon startup.
How does model year affect 6.7 Powerstroke oil leaks?
Different model years of the 6.7 Powerstroke exhibit distinct oil leak patterns, with early 2011-2014 models suffering from plastic lower oil pan warpage, while 2015-2019 models are more prone to upper pan leaks driven by clogged, non-serviceable CCV systems.
Ford made several updates to the 6.7L engine throughout its production run to address these sealing issues. The table below outlines the specific vulnerabilities and upgraded components associated with different model year ranges:
| Model Years | Primary Leak Points | Root Cause | Recommended Upgrades & Solutions |
|---|---|---|---|
| 2011 – 2014 | Plastic lower oil pan, vacuum pump gasket, early turbo feed lines. | Plastic pan warping from heat cycles; early-generation rubber compound failures. | Retrofit with OEM stamped steel lower oil pan; replace vacuum pump gasket with updated Viton seal. |
| 2015 – 2019 | Upper oil pan RTV failure, sealed CCV box clogging. | Clogged CCV builds crankcase pressure, forcing oil past the upper pan RTV seal. | Install a serviceable CCV conversion kit or replace the sealed CCV box every 60,000 miles. |
| 2020 – Present | Upper oil pan RTV failure, front crankshaft seal. | Increased cylinder pressures from steel piston design putting extra load on gaskets. | Ensure crankcase pressure remains low; use only high-grade Motorcraft TA-31 sealant for repairs. |
Why do dealerships misdiagnose 6.7 Powerstroke oil leaks?
Dealerships and independent shops frequently misdiagnose 6.7 Powerstroke oil leaks because they rely on quick visual inspections of the transmission bellhousing rather than performing thorough dye tests, leading them to recommend expensive rear main seal repairs.
The layout of the 6.7 Powerstroke engine bay makes physical inspection incredibly difficult. The engine sits deep in the engine bay, and the firewall blocks a clear view of the rear of the block. When a technician sees oil dripping from the inspection cover of the transmission bellhousing, standard flat-rate diagnostic guides point directly to a failed rear main seal or upper oil pan gasket.
Because these repairs are highly lucrative (often billing between 12 and 16 hours of labor), there is a strong financial incentive for a shop to recommend a complete upper oil pan reseal. However, in a vast majority of cases, the oil is actually migrating from a much higher and cheaper-to-fix component, such as the turbocharger oil lines or the vacuum pump.
As a truck owner, you should always demand that the shop perform a UV dye test and show you the glowing dye path using a blacklight before agreeing to any high-dollar oil leak repair. If they cannot show you a clear path of dye originating directly from the upper oil pan seam or the rear main seal, do not authorize the repair.
Frequently Asked Questions
Can I drive my 6.7 Powerstroke with an upper oil pan leak?
Yes, you can safely drive your truck with a minor upper oil pan leak, provided you monitor your oil level closely and top it off as needed. Because these leaks typically present as slow seeps rather than sudden pressurized blowouts, they do not pose an immediate threat to the engine. However, you should address the leak as soon as possible, as escaping oil can degrade rubber suspension bushings and starter motor wiring underneath the engine.
What is the best sealant to use for a 6.7 Powerstroke oil pan?
You should exclusively use Motorcraft TA-31 Diesel Engine RTV Silicone Sealant. Standard automotive silicone sealants sold at local auto parts stores cannot withstand the high chemical shear forces and thermal expansion rates of the 6.7L diesel engine. Using an aftermarket sealant almost guarantees that the oil pan will begin leaking again within 10,000 miles of the repair.
How does a clogged CCV cause oil leaks on this engine?
The Crankcase Ventilation (CCV) system is designed to vent blow-by gases out of the crankcase and back into the intake. When the CCV filter becomes clogged with oil and soot, these gases cannot escape, causing pressure to build up inside the engine block. This positive pressure acts like a pump, pushing engine oil past the weakest seals in the engine, most notably the upper oil pan RTV and the vacuum pump gasket.
Is there an aftermarket metal oil pan upgrade for the plastic pans?
Yes, several aftermarket manufacturers offer high-quality billet aluminum or stamped steel lower oil pan upgrade kits. Upgrading to a metal pan is highly recommended for any 2011-2014 truck still running a factory plastic pan, as metal pans do not warp under heat and use a reliable, reusable gasket or a robust RTV seal that eliminates leaks permanently.
Conclusion
While oil leaks on a 6.7 Powerstroke can be frustrating and expensive, a disciplined diagnostic approach can prevent you from paying for unnecessary repairs. Always rule out the vacuum pump gasket, lower oil pan, and CCV system before committing to a costly upper oil pan or rear main seal replacement. By keeping your crankcase ventilation system clean and using high-quality OEM parts and sealants, you can keep your Powerstroke running clean and dry for hundreds of thousands of miles.
Leave a Reply