
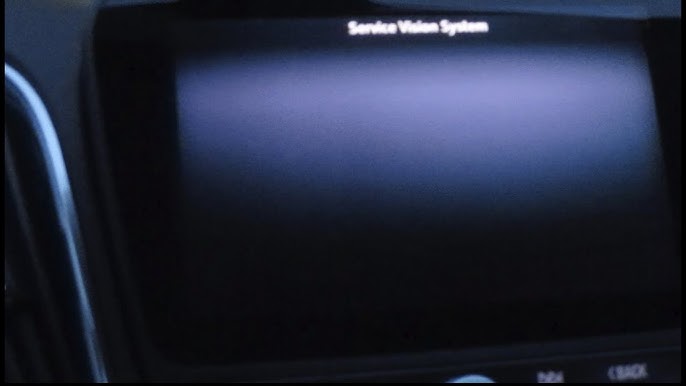
A Chevy backup camera stops working mainly due to a failed camera module, corroded wiring at the liftgate hinge, a blown fuse, a faulty infotainment display, or moisture intrusion inside the camera housing. The most common fix is replacing the camera assembly (GM part 84155620 or similar) or repairing damaged wiring in the rear harness—jobs that can cost between $150 and $600 at a shop but under $200 if you DIY.
Why Did My Chevy Backup Camera Stop Working All of a Sudden?
Most Chevy backup cameras fail without warning because the internal CCD sensor degrades over time or moisture seeps into the housing through a cracked seal.
GM used the same Delphi-sourced camera modules across multiple generations, and these units have a known lifespan of roughly 4 to 7 years depending on climate.
If your screen went black, shows static, displays a “Service Rear Vision System” message, or simply never activates when you shift into reverse, the problem is almost always one of five things:
- ▶ Failed camera module — the most frequent cause on Silverado, Tahoe, Suburban, and Equinox models from 2014–2022
- ▶ Damaged wiring harness — wires chafe at the liftgate or tailgate hinge where they flex every time you open the rear
- ▶ Blown fuse or relay — often overlooked and the cheapest fix
- ▶ Infotainment or display malfunction — MyLink or Infotainment 3 system glitches can kill the camera feed
- ▶ Corroded or loose connectors — especially in northern states with road salt exposure
How Do I Diagnose a Chevy Backup Camera That Shows a Black Screen?
A black screen when shifting into reverse usually points to either a dead camera module or a broken power/ground wire going to the camera.
You can narrow it down with a multimeter and a test light in about 15 minutes without removing any trim panels.
Step 1: Check the Fuse First
Open the fuse box under the hood or on the driver’s side dash and locate the backup camera fuse.
On most 2014–2019 Silverados and Sierras, the camera shares a fuse with other rear accessories—typically a 10A fuse labeled “RR CAMERA” or within the “AUX” circuit.
- ✓ Use the fuse diagram on the back of the fuse box cover to identify the correct fuse
- ✓ Pull the fuse and visually inspect it or use a multimeter on continuity mode
- ✓ Replace with the same amperage rating—never upsize a fuse
Step 2: Test for Power at the Camera Connector
With a helper watching the multimeter, shift into reverse (engine running, parking brake on). Probe the camera connector at the rear of the vehicle.
You should see approximately 6V to 12V on the power wire depending on your model year. If you get zero volts, the problem is upstream—either the fuse, the body control module (BCM), or the wiring between the BCM and the camera.
Step 3: Inspect the Wiring at the Liftgate Hinge
This is the number one physical failure point on Chevy SUVs and trucks. Open the liftgate or tailgate and look at the rubber boot or conduit where wires pass from the body to the door.
Peel back the boot and inspect each wire for:
- ⚠ Fraying or exposed copper from repeated flexing
- ⚠ Green corrosion on the wire strands or connector pins
- ⚠ Broken wires that look intact on the outside but have snapped internally
On 2015–2020 Tahoe and Suburban models, GM issued a technical service bulletin (TSB 18-NA-397) acknowledging the wiring chafe issue at the liftgate. If your VIN falls within the affected range, a dealership may repair it under a special coverage program.
How Do I Fix a Chevy Backup Camera That Is Blurry or Foggy?
A blurry or foggy backup camera image almost always means moisture has entered the camera housing or the lens has been scratched or hazed by UV exposure. This is extremely common on 2014–2021 Silverado, Tahoe, and Colorado models that spend time outdoors.
Temporary Fix: Dry Out the Housing
- Remove the camera from the tailgate or liftgate (usually held by one or two Torx screws and a snap-in housing)
- Place the camera module in a sealed bag with silica gel packets for 24 to 48 hours
- Clean the exterior lens with a microfiber cloth and isopropyl alcohol
- Reinstall and test before sealing—this buys you time but rarely lasts permanently
Permanent Fix: Replace the Camera Module
If the housing seal is compromised, moisture will keep returning. The OEM camera assembly for most Silverado and Sierra models costs between $80 and $150 from GM parts dealers online.
Aftermarket replacements are available for $30 to $60, but image quality and night vision performance are noticeably worse on cheap units.
Pro Tip: When you install the new camera, apply a thin bead of clear silicone sealant around the housing gasket before snapping it back in. This prevents the same moisture intrusion from happening again in two years.
What Does “Service Rear Vision System” Mean on a Chevy?
This message appears on the infotainment screen when the BCM detects a communication fault with the rear camera module over the LIN or LVDS data bus.
It does not always mean the camera itself is bad—it can also be triggered by a software glitch in the infotainment system, a bad connector, or a BCM that needs reprogramming.
First Step: Perform a System Reset
Before spending money on parts, try resetting the infotainment system:
- Turn the vehicle off and open the driver’s door to fully power down the electronics
- Disconnect the negative battery terminal and wait 15 minutes
- Reconnect the battery and start the vehicle—shift into reverse to see if the camera initializes
On 2019 and newer models with Infotainment 3, you can also try a soft reset by holding the Home and Fast-Forward buttons on the infotainment bezel for 10 seconds until the screen goes black and restarts.
Second Step: Check for Software Updates
GM has released multiple software updates for the MyLink and Infotainment 3 systems that address camera feed dropouts and false “Service Rear Vision System” messages.
A dealership or a shop with a GM GDS2 diagnostic tool can flash the latest software onto your system. This often resolves the issue entirely when no physical hardware has failed.
Third Step: Scan for Diagnostic Trouble Codes (DTCs)
Use an OBD-II scanner that reads body and chassis modules—not just engine codes. Look for codes like:
- ▶ B127C — Rear Vision Camera Signal Performance
- ▶ B1015 — Rear Camera Module Communication Lost
- ▶ U0159 — Lost Communication with Rear Camera
These codes tell you whether the BCM can talk to the camera at all, which separates a wiring problem from a camera failure.
How Much Does It Cost to Replace a Chevy Backup Camera?
At a dealership, expect to pay between $350 and $600 for a full backup camera replacement including parts and labor on a Silverado, Tahoe, or Suburban. An independent shop typically charges $200 to $400.
DIY replacement costs under $200 if you buy OEM or quality aftermarket parts.
How Do I Replace the Backup Camera on a Chevy Silverado Myself?
You can replace the backup camera on a 2014–2019 Silverado in about 30 minutes with basic hand tools. The camera mounts inside the tailgate handle bezel and connects with a single plug-and-play harness.
Tools You Need
- ● T15 or T20 Torx bit (varies by model year)
- ● Flat-blade trim pry tool
- ● 10mm socket for the tailgate trim panel clips
- ● Electrical contact cleaner
- ● Replacement camera module
Replacement Steps
- Lower the tailgate and locate the two Torx screws on the underside of the tailgate handle bezel
- Remove the screws and gently pry the bezel away from the tailgate—do not force it, as the clips are fragile
- Disconnect the camera harness connector by pressing the release tab and pulling straight out
- Remove the old camera module from the bezel—it typically twists or snaps out
- Spray the new connector and the vehicle-side plug with electrical contact cleaner to ensure a clean connection
- Install the new camera, reconnect the harness, snap the bezel back into place, and reinstall the Torx screws
- Shift into reverse and verify the image appears on screen with correct orientation
Important: If the image appears upside down or reversed after replacement, you may need to have the camera configuration reset with a GM-compatible scan tool. Some aftermarket cameras come pre-flipped, but OEM units should display correctly out of the box.
Do Different Chevy Models Have Different Backup Camera Problems?
Yes—while the underlying causes overlap, certain models have specific weak points that owners and technicians see repeatedly in the shop.
2014–2019 Chevy Silverado and GMC Sierra
- ▶ Camera failures peak around 50,000–80,000 miles due to vibration from the truck bed
- ▶ Wiring chafe at the tailgate hinge is extremely common—check this first
- ▶ The camera is built into the tailgate handle bezel, making replacement straightforward
2015–2020 Chevy Tahoe and Suburban
- ▶ Liftgate wiring harness damage is the top cause—GM has a known TSB for this
- ▶ Water intrusion into the camera housing is second—look for condensation inside the lens
- ▶ Some owners report the camera works intermittently, which almost always points to a chafed wire that makes and breaks contact as the liftgate opens and closes
2018–2023 Chevy Equinox and GMC Terrain
- ▶ Infotainment software glitches cause the camera to freeze or show a black screen more than hardware failure
- ▶ A system update at the dealership resolves the issue in most cases without replacing the camera
- ▶ The camera sits above the license plate and is exposed to road debris—inspect for cracks or chips in the lens
2016–2022 Chevy Cruze and Malibu
- ▶ These sedans rarely have the wiring chafe issue since the trunk lid has shorter wiring runs
- ▶ Camera failure is usually internal and requires full module replacement
- ▶ Aftermarket cameras work reasonably well on these models because the mounting point is standardized
Frequently Asked Questions
Can I drive my Chevy without a working backup camera?
Yes, you can legally drive without a backup camera in most U.S. states since it is a convenience feature, not a primary safety system. However, all vehicles sold in the U.S. since 2018 are federally required to have a backup camera, so getting it repaired maintains your vehicle’s compliance and resale value.
Will a Chevy backup camera work if it is disconnected and reconnected?
In most cases yes—if the camera was working before disconnection, simply unplugging and replugging the connector can resolve a poor-contact issue. Spray both sides of the connector with electrical contact cleaner before reconnecting to remove any oxidation that may have caused the intermittent failure.
Does my Chevy backup camera need programming after replacement?
OEM replacement cameras on 2014–2018 models are generally plug-and-play and do not require programming. On 2019 and newer models with Infotainment 3 and higher-resolution camera feeds, a dealership may need to perform a configuration reset with GDS2 to ensure proper image orientation and gridline display.
Why does my Chevy backup camera work sometimes but not others?
Intermittent camera operation almost always indicates a wiring problem rather than a failing camera module. The most common cause is a partially broken wire at the hinge point that makes contact when the tailgate or liftgate is in one position but loses contact when it moves.
Inspect the wiring harness at the hinge and you will almost certainly find the culprit.
Can I upgrade my Chevy’s backup camera to a higher resolution?
Yes, aftermarket HD camera modules are available that drop into the same mounting points as the OEM unit. However, the resolution improvement depends on your head unit—older MyLink systems with lower-resolution displays will not show the full benefit.
If your goal is better night vision, look for cameras with infrared LEDs rather than just higher pixel counts.
Fix It Once and Fix It Right
A Chevy backup camera failure is one of the most common—and most misdiagnosed—issues owners face. Dealerships often quote full infotainment replacements when a $15 fuse or a $100 camera module would solve the problem.
Before authorizing expensive repairs, walk through the diagnostic steps above: check the fuse, test for power, inspect the wiring at the hinge, and only then replace the camera module. In the majority of cases, you can get your camera working again in under an hour for less than $200, even with zero prior repair experience.
Leave a Reply