
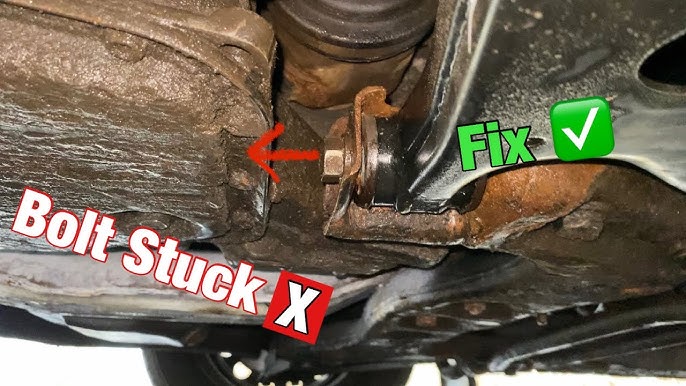
A stuck control arm bolt is usually caused by corrosion welding the bolt to the bushing sleeve or subframe bracket. To remove it, soak the bolt with penetrating oil overnight, then use heat from a propane torch combined with an impact wrench or breaker bar. If the bolt still won’t budge, you may need to cut it out with a reciprocating saw or grind the head off.
Why Is My Control Arm Bolt Stuck and Won’t Come Out?
A control arm bolt gets stuck because the inner metal sleeve of the control arm bushing seizes onto the bolt through years of rust and corrosion. This is especially common in vehicles driven in salt-belt states or coastal areas where road salt and moisture accelerate the chemical bond between dissimilar metals.
The OEM design compounds this problem. Most manufacturers use a plain steel bolt pressed through an aluminum or steel sleeve inside a rubber bushing.
Water enters the gap between the bolt and sleeve, and over 2-4 years, rust fills every void. At that point, the bolt and sleeve become one solid piece.
What Makes Control Arm Bolts Different From Other Suspension Bolts
Unlike a caliper bolt or strut bolt, a control arm bolt passes through a rubber bushing sleeve with tight tolerances. The rubber traps moisture against the bolt shank.
Even if the head turns freely, the shank is often seized inside the sleeve and will simply spin without extracting.
- The bolt shank rusts to the inner sleeve of the bushing
- The bolt head strips because it was over-torqued at the factory
- The subframe capture nut or weld nut breaks free and spins behind the bracket
- Cross-threading from a previous repair causes the bolt to jam
How to Remove a Stuck Control Arm Bolt at Home
Start by soaking the bolt and surrounding area with a quality penetrating oil like PB Blaster or Kroil, and let it sit for at least 12 hours. Apply heat with a propane or MAP gas torch to expand the metal, then use an impact wrench to shock the bolt loose.
If that fails, cut the bolt head off with a reciprocating saw and press the remaining shank out.
Step-by-Step Removal Method
- Penetrating soak: Spray PB Blaster on both sides of the bolt and the bushing sleeve. Reapply every few hours for 24 hours if possible.
- Wire brush cleanup: Remove surface rust and debris from the bolt head and exposed threads with a stiff wire brush.
- Apply heat: Use a MAP gas torch and heat the subframe bracket area around the bolt for 60-90 seconds. Do not heat the rubber bushing directly or it will melt and create a bigger mess.
- Impact wrench: Use a 1/2-inch impact wrench on the bolt head while holding the nut with a wrench on the other side. The hammering action of the impact wrench breaks corrosion bonds better than steady torque.
- Breaker bar backup: If you lack an impact wrench, use a long breaker bar with a cheater pipe for leverage. Have a helper hold the opposing nut.
- Cut and press: If the bolt still will not move, cut the head off with a reciprocating saw using a bi-metal blade, then drive the remaining shank out with a punch and hammer.
Tools You Will Need
What to Do When the Control Arm Bolt Just Spins and Won’t Back Out
If the bolt spins freely but does not come out, the capture nut behind the subframe bracket has broken loose. You need to clamp the sleeve or cut access to hold the backside.
On some vehicles, the bolt passes through a weld nut on the frame, and if that nut breaks, you must grind an access window or drill it out.
How to Stop a Spinning Bolt
- Vise-grip the sleeve: If any portion of the bushing sleeve protrudes, clamp it with locking vise-grips to hold it while you turn the bolt.
- Use a second wrench: Many bolts have a hex machined into the shank near the head. Insert an Allen key or wrench into that hex to counter-hold.
- Grind an access slot: Use a rotary tool or angle grinder to cut a small window in the subframe bracket. Insert a wrench or socket onto the broken weld nut from behind.
- Drill and re-thread: Drill out the destroyed weld nut and install a new nut with a washer on the backside. Use grade 8 hardware.
Model-Specific Control Arm Bolt Problems and Fixes
Ford F-150 and Expedition (2004-2014)
The rear lower control arm bolts on these trucks seize into the subframe weld nuts at an extremely high rate. Ford used a thin zinc coating that corrodes quickly in northern climates.
The capture nut is welded to the inside of the frame rail with no access window.
Fix: Soak the bolt for 48 hours with penetrating oil. Heat the frame bracket with a MAP torch. Use a 3/4-inch impact wrench.
If the weld nut breaks, you will need to cut an access hole through the frame rail, install a new nut and backing plate, then weld the plate in place.
Honda Accord and Civic (2003-2012)
These vehicles use a long through-bolt on the rear lower control arm that passes through a flanged bushing sleeve. The sleeve corrodes to the bolt, and the soft 12mm bolt head strips easily.
Honda used a lower grade bolt than necessary.
Fix: Use a six-point socket only—never a 12-point on these bolts. If the head strips, weld a larger nut onto the bolt head and turn it out.
Replace the bolt with a grade 10.9 or higher equivalent.
Toyota Tacoma and 4Runner (2005-2015)
The cam bolts on the front upper control arms freeze in the eccentric cam plates. When this happens, you cannot adjust alignment after replacing the control arms.
The cam plates and bolts often need to be cut out entirely.
Fix: Apply heat to the cam plate area, not the bolt. Use a reciprocating saw to cut between the control arm and the frame bracket to free the assembly.
Replace with new OEM cam bolt kits (Toyota part number 48392-35010 and related pieces).
Chevrolet Silverado and GMC Sierra (2007-2018)
Rear lower control arm bolts on these trucks pass through boxed frame sections. The captive nut is a welded plate inside the frame with zero access.
If the weld nut breaks, the bolt and nut both spin inside the frame rail.
Fix: The only reliable fix is to cut a small access window in the frame rail with an angle grinder. Hold the broken nut with vise-grips through the window, remove the bolt, then weld a new nut plate in place and seal the access cut.
How to Prevent Control Arm Bolts From Seizing in the Future
Apply anti-seize compound to the bolt shank and the inside of the bushing sleeve before installation. Use a marine-grade or copper-based anti-seize rated for high-temperature suspension use.
Coat every control arm bolt during any suspension service, even if the factory did not.
- Coat bolt threads and shank with copper anti-seize before reassembly
- Apply a thin layer of grease to the bushing sleeve interior
- Spray completed bolts with a rust inhibitor like Fluid Film once a year
- Avoid over-torquing—use a torque wrench and follow OEM specs exactly
- Replace any bolt that shows visible surface pitting or thread damage
FAQ
Can I drive with a broken control arm bolt?
No. A missing or broken control arm bolt means the control arm is no longer properly secured to the frame or subframe. The wheel can shift unpredictably, causing a loss of steering control.
Tow the vehicle to a shop or complete the repair before driving.
Will a dealer replace a seized control arm bolt for free under warranty?
Most dealers will not cover a seized bolt under the standard bumper-to-bumper warranty because they classify it as corrosion, which falls under perforation-only rust warranties.
Some manufacturers have released TSBs or extended coverage for specific models—check with the dealer’s service department using your VIN.
How much does a shop charge to extract a stuck control arm bolt?
Most independent shops charge between $150 and $400 for bolt extraction depending on severity. If cutting, welding, or frame modification is required, the labor can climb to $500 or more.
Dealerships typically quote higher because they charge book-time for the full control arm replacement even if only the bolt needs attention.
Can I use a blowtorch on a control arm bolt near a fuel tank?
Only if the fuel tank is at least 18 inches away from the work area and you use a heat shield. For rear lower control arms on vehicles where the fuel tank is close to the subframe, use a heat induction tool instead of an open flame.
Safety must come before speed.
What size are most control arm bolts?
Front lower control arm bolts are commonly 18mm or 21mm hex head. Rear lower control arm bolts range from 17mm to 22mm depending on the manufacturer.
Always verify the exact size with a service manual for your year, make, and model before applying force.
Final Thoughts on Dealing With a Stuck Control Arm Bolt
A seized control arm bolt is one of the most frustrating suspension repairs because the fix often exceeds the scope of the original job. Patience and penetrating oil solve roughly 70 percent of cases.
For the remaining 30 percent, heat, impact force, and cutting tools are your best friends. Always replace seized bolts with new hardware coated in anti-seize so you never fight this battle again on the same vehicle.
Leave a Reply