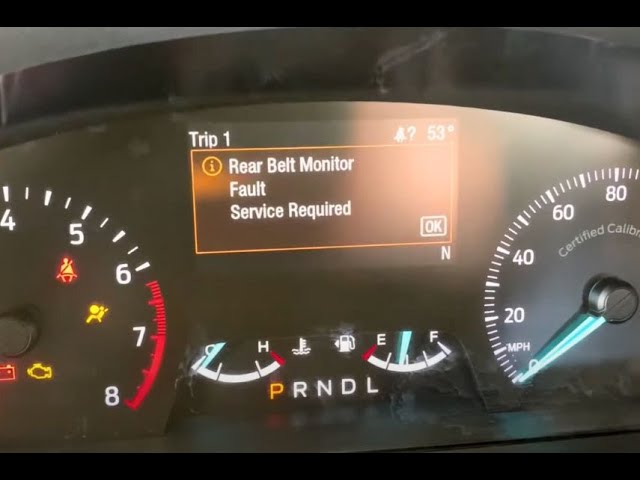
The rear belt monitor fault on a Ford Escape is most often caused by a failed rear seat belt buckle switch or chafed wiring in the harness under the rear seat cushion.
What triggers the rear seat belt monitor fault on Ford Escape models?
A failed buckle switch or broken wire in the rear seat harness prevents the restraint control module from seeing a completed circuit when the belt is buckled. This fault appears after seat removal, heavy cargo use, or when water has entered the buckle assembly.
Owners commonly report the warning returns within days after a dealer clears the code without addressing the root wiring issue.
Common model-year patterns
2013–2016 Escapes suffer from brittle insulation on the yellow seat-belt circuit wires where they pass through the seat riser.
2017–2019 models more often show internal contact corrosion inside the buckle itself after the vehicle has been exposed to road salt.
2020 and newer Escapes add a separate rear occupant classification sensor that can set the same monitor fault when its connector loosens during seat track movement.
How do you safely diagnose the rear belt monitor without a dealer scan tool?
Begin with a visual inspection of the rear seat belt buckles and the wiring that exits each buckle and travels under the cushion.
Disconnect the battery, wait ten minutes, then unplug the two 2-pin connectors at the rear of the seat cushion. Use a multimeter to check continuity through each buckle switch in both buckled and unbuckled states.
Step-by-step continuity test
- Remove the rear seat cushion by releasing the two front clips and sliding the cushion forward.
- Locate the yellow or black 2-pin connectors clipped to the floor pan.
- With the belt unbuckled, resistance should read open (OL). With the belt buckled, resistance should read less than 5 ohms.
- If either buckle fails this test, replace the buckle assembly rather than attempting repair.
Why do shops often misdiagnose or overquote this fault?
Dealerships frequently quote replacement of the entire restraint control module or the full rear seat harness because the code points to “RCM internal fault.”
In reality the module is simply reporting an open circuit that originates at the buckle or a chafed wire 12 inches away. Independent shops sometimes replace only the driver’s buckle because that code appears first in the scan list, leaving the rear fault untouched.
Real-world cost comparison
| Repair | Typical shop quote | DIY parts cost |
|---|---|---|
| Rear buckle assembly (one side) | $380 | $65 |
| Module replacement plus programming | $1,150 | $420 (used module) |
| Full harness replacement | $920 | $180 (used section) |
How to repair chafed wiring under the rear seat
Locate the point where the harness crosses the seat riser bracket. The insulation is usually worn through on the driver’s side first.
Slide a section of split-loom tubing over the damaged area and secure it with high-temperature tape so the repair survives future seat removal.
Detailed repair sequence
- Disconnect the battery negative terminal.
- Remove the rear seat cushion and fold the seat backs forward.
- Peel back the carpet edge to expose the harness where it clips to the floor.
- Cut away the damaged insulation, stagger the splices, and solder each conductor.
- Apply heat-shrink tubing rated to 125 °C over every splice.
- Reinstall the carpet and test buckle continuity before bolting the seat back in place.
How to reset the fault after repair
Clear the code with an OBD-II tool that can access the restraint control module. Cycle the ignition three times while monitoring the seat-belt warning lamp.
The lamp should extinguish after the third cycle if the circuit is now complete. If the light returns, recheck the splice or buckle you just serviced.
Preventing repeat failures on the same vehicle
Apply dielectric grease to the buckle connectors and add a short length of convoluted tubing wherever the harness bends sharply at the seat riser.
Owners who frequently remove the rear seat for cargo should route an additional 6 inches of slack into the harness before securing the clips.
Recommended maintenance interval
- ➔ Every 30,000 miles: inspect the rear buckle connectors for green corrosion.
- ➔ After any rear-seat removal: verify continuity before returning the vehicle to service.
- ➔ Before winter in salt-belt states: spray the exposed connectors with contact cleaner and re-grease.
FAQ
Can I drive with the rear belt monitor fault displayed?
The vehicle remains drivable, but the supplemental restraint system may not recognize a buckled rear passenger, disabling side-curtain deployment logic in a side-impact event.
Will replacing only the buckle fix the fault permanently?
Yes, provided the wiring between the buckle and the floor connector shows good continuity. Many owners still experience repeat faults because they skip the wiring inspection.
Does the fault affect front seat belt reminders?
No. The front and rear circuits are separate; the front belt monitor continues to function normally.
Is there a TSB covering this exact concern?
Ford issued TSB 16-0068 for 2013–2016 models that addresses rear seat belt switch circuit opens caused by harness chafing at the seat riser.
Can aftermarket seat covers trigger this fault?
Thick aftermarket covers can prevent the buckle from fully seating, keeping the switch open. Remove the cover and retest before replacing any components.
Addressing the rear belt monitor fault on a Ford Escape requires locating the open circuit at either the buckle switch or the harness under the seat.
Once the physical repair is completed and the code cleared, the warning remains off and the restraint system regains full functionality.
Owners who follow the continuity checks and wiring reinforcement steps outlined above avoid repeated module replacements and dealer misdiagnosis.
Leave a Reply