Norcold RV refrigerators perform best when set between 3 and 5 on the dial control, with level 4 serving as the starting point for most travel conditions before fine-tuning after 24 hours.
How do you set the temperature on a Norcold RV refrigerator?
The correct starting point is level 4 on the mechanical dial found inside the fresh food compartment on most models.
This position balances cooling across both the refrigerator and freezer sections when ambient temperatures range from 60 to 90 degrees Fahrenheit.
Turn the dial clockwise to increase cooling and counterclockwise to reduce it.
Allow a full 24 hours after any change before checking food temperatures with a separate thermometer placed in the center of the refrigerator section.
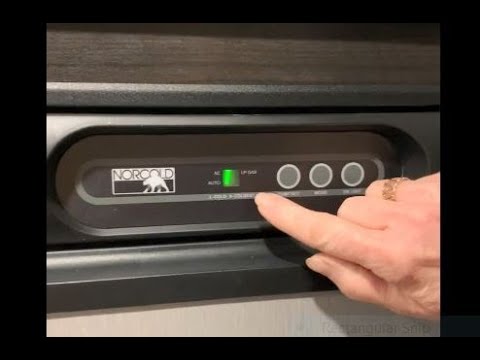
Digital models use up and down arrows on the control panel.
Press the temperature button until the display shows 38 degrees Fahrenheit for the refrigerator and 0 degrees for the freezer.
Step-by-step adjustment process
- Park the RV level using a bubble level on the floor and counter.
- Switch the refrigerator to auto or gas mode and let it run empty for two hours.
- Place an accurate thermometer in the middle shelf and another in the freezer.
- Adjust the dial one number at a time, waiting 24 hours between changes.
- Record temperatures at the same time each day to identify patterns.
Why does my Norcold RV refrigerator keep running on the wrong setting?
Most Norcold units default to auto mode and will stay on 120-volt power when available, even if that source cannot maintain proper temperatures during hot weather.
Owners often leave the dial at the factory preset of 5 or higher, causing the cooling unit to work harder than necessary.
This overworking often leads to frost buildup or weak performance on gas.
Check the mode switch first to ensure the unit is utilizing the most efficient power source for your current environment.
If the unit shows a flame but the refrigerator section stays above 45 degrees, the thermostat sensing tube may be out of position against the evaporator plate.
Reposition the tube so it touches the plate firmly without kinking.
Common mode-related causes and fixes
- Auto mode locked on shore power: Switch manually to gas when boondocking above 85 degrees ambient.
- Thermostat out of calibration: Remove the plastic cover and gently bend the sensing tube back into contact with the cooling fins.
- Door seal allowing warm air: Run a dollar bill test around the gasket and replace if it pulls out easily.
What are the best Norcold settings for hot weather camping?
In temperatures above 90 degrees, start at level 5 or 6 and monitor closely to prevent freezing.
Never exceed level 7, as this can damage the cooling unit by overworking the boiler.
Pre-cool the unit overnight before travel and keep the refrigerator stocked with cold items rather than warm food.
Open the vent covers on the exterior access panel to improve airflow across the coils.
If the unit still struggles, switch to 120-volt power whenever hookups are available.
Gas mode tends to lose efficiency faster than electric in extreme heat conditions.
Hot weather checklist
- Verify roof vent is clear of debris and nests.
- Increase dial setting only after confirming interior temperature exceeds 42 degrees.
- Use a small 12-volt fan inside to move air across the evaporator.
- Limit door openings to under 30 seconds each time.
How do I troubleshoot a Norcold refrigerator that will not cool on any setting?
Begin by confirming the unit is level within two degrees front to back and side to side.
An out-of-level condition is the leading cause of cooling failure on absorption refrigerators.
Next, verify the power source. On gas, listen for a click every 30 to 60 seconds and check for a steady blue flame through the sight glass.
On electric, measure 110 to 120 volts at the outlet.
If both sources check out, inspect the cooling unit for ammonia smell or yellow residue at the rear access panel.
This indicates a leak requiring replacement of the cooling unit.
Diagnostic sequence by power source
Gas operation
- Confirm propane pressure at 11 inches water column.
- Inspect the burner orifice for spider webs or rust.
- Clean the flue tube with a flue brush if soot is present.
Electric operation
- Test the heating element resistance at 45 to 55 ohms.
- Check the relay board for burned traces on older N-series models.
- Replace the power module if the unit switches modes but never heats.
Norcold RV refrigerator maintenance that protects your settings
Clean the burner assembly and flue annually, even if the unit cools correctly.
Dust buildup changes how the thermostat senses temperature and forces higher dial settings than needed.
Inspect door gaskets every six months by closing a piece of paper in the door and pulling gently.
Replace gaskets that allow easy removal to maintain the internal climate.
Level the refrigerator mounting screws if the coach floor has settled.
Proper alignment is critical as it affects coolant flow inside the cooling unit.
FAQ
Should I turn my Norcold refrigerator off when driving?
Leave the unit running on 12-volt power while driving if your model supports it. Turning it off allows the cooling unit to lose temperature quickly and requires longer recovery time at the campsite.
How long does it take a Norcold to reach proper temperature after changing the setting?
Expect 12 to 24 hours for the system to stabilize after any dial adjustment. Checking too soon leads to over-correction and temperature swings.
Can I use a residential thermometer inside my Norcold?
Yes, but place it toward the front of the middle shelf rather than the back wall where temperatures run colder. This gives a more accurate reading of food storage conditions.
What dial setting works for boondocking versus full hookups?
Use level 3 to 4 on gas when boondocking and level 4 to 5 on electric at campgrounds. The electric element provides more consistent heat, allowing a slightly higher setting without freezing.
Conclusion
Proper Norcold RV refrigerator settings start with level 4 and require patience, accurate leveling, and regular maintenance.
Owners who monitor temperatures over multiple days and adjust only after confirming actual conditions avoid most cooling complaints.
Following the step-by-step checks for each power source and climate condition keeps the unit reliable without unnecessary service calls.
Leave a Reply